-
Aho Pēpi
-
Aho Uku - Ceramic taonga
-
Aho Kāinga - Interiors and Decor


$40.00
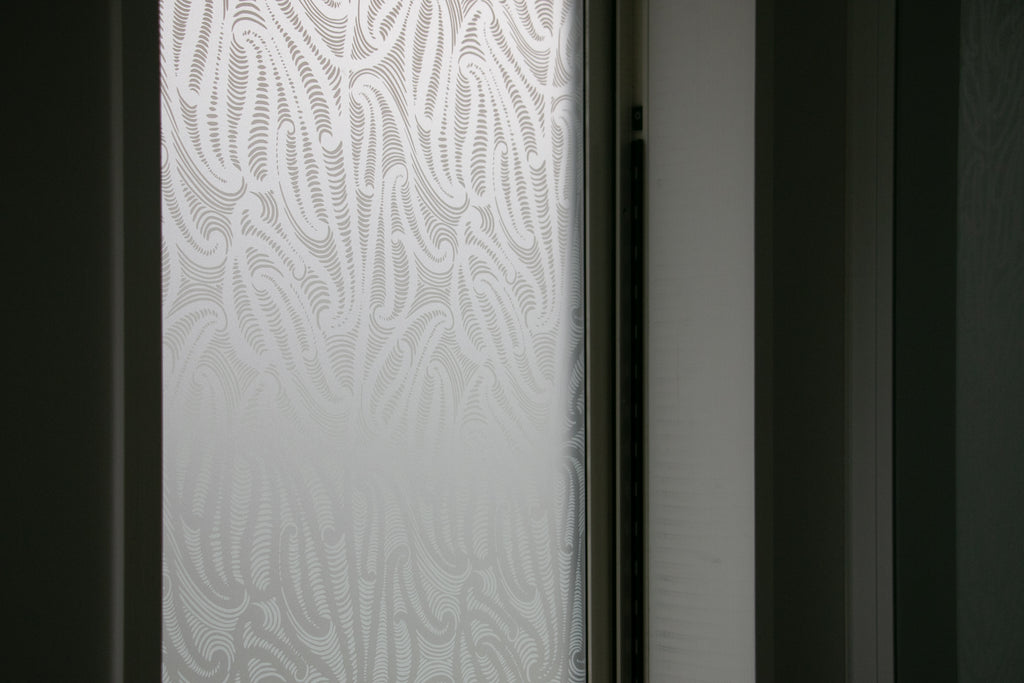
At last, a beautiful solution to those tricky spots where you require privacy- either from a less than beautiful view, or for those inside from those passing by. Half art, half practicality.
You can choose from 4 of our signature Aho designs including Ihi, Poutama, Kōtuituia and Rauponga.
This window film is a permanent frosted film. It is suitable for any smooth glass surface - including in bathrooms. It does not have any UV filtering accreditation but it does diffuse direct light.
Please see below for both a diy video and measuring and installation tips for your film.
Please Note:
Once you have placed your order, we will email you to confirm that the dimensions are correct.
Once you have confirmed, we will add your order to the production schedule.
Your order will be made-to-order and you can expect your order to be shipped within 2 weeks of having been placed.
If none of these sizes are suitable for your project, please email us directly at kiaora@ahocreative.com and we can arrange a custom size for you.
Our standard sizes are here as a convenient option, but also as an indication of pricing for you.
We’d highly recommend that you measure your windows and we can create a custom size that will be the perfect fit. This will eliminate the need to trim it when it arrives. Getting a custom size is also the most cost effective option and takes no more time than a standard size to produce.
1.2m width is the largest recommended width for installation. When the width will exceed this we recommend installing in panels. We can discuss your individual project needs further by email.
This product is intended for DIY application however it is a commercial quality product. Please read the instructions carefully and watch our video on how to install it as we are unable to replace or refund for a faulty installation.
Frosted privacy films are translucent, allowing light to pass through while limiting visibility day or night.
This window film is suitable for bathroom and steamy environments as well as it is well adhered to a clean smooth window.
You can clean your frosted window as usual once the film has set, We'd recommend leaving it for a day or so to ensure that it is adhered completely.
This is a permanent product. While it may be possible to remove with the application of heat at a later stage, we would not recommend this (and have not tried it ourselves). It remains relatively easy to remove for the first few days after it was installed.
How to measure your window:
To select the correct size, measure your window glass. Then Add 2cm to the width and 1cm to the length to ensure that the film is the correct size with enough surplus/ bleed for a final trim.
Eg. Window is 40cm x 100cm. You will need window film that is 42cm x 101cm.
How to install:
Clean the window thoroughly with an ammonia-based window cleaner and wipe it dry. Make sure that all of the window cleaner is wiped off, as it can dissolve the adhesive on the window film.
Measure the window to see how large an area you need to cover, allowing at least one centimetres overlap for both sides and the lower edge. Roll the window film out onto a flat horizontal surface and trim to size. Before you put the film on the window, start peeling the backing off the sticky side of the film.
Fill a spray bottle with water and add a couple of drops of baby shampoo/ dishwash detergent. Spray the mixture onto the window. This mixture helps the film stick to the window but still lets you slide the film around so you can fit it properly into the corners before the liquid mixture dries.
Once you've peeled off the top five to ten centimetres of backing, move the film up to the surface of the window (we recommend getting someone to assist with this stage to help hold the film up onto the window. Start by putting the top two corners in place. Once the film is sitting in a good position you can slowly start to take the rest of the backing off.
Slowly peel the backing off in stages. Use a squeegee or the palm of your hand to gently flatten the film out onto the window as you go. Start the squeegee in the centre of the window and push out to the edges. As you work down the window, use the spray bottle to keep the surface as moist as possible. It will give you a much smoother finish. You can add additional spray to both the window facing side of the film as well as the room-facing side.
Now use the squeegee to gently smooth any small pockets of air or water out from the window film, leaving the film completely flat on the window. You can work out any small pockets of water at the same time. If you discover any difficult to smooth bubbles, it is possible to lift the film away from the window and start over. Whatever small amounts of moisture are left will work with the adhesive on the film to create a bond to the window.
7). Trim the surplus film from the window.
Now that your window film is adhered smoothly to your window, it is time to trim the excess that will be on both sides and the bottom edge. Using your craft knife and ruler push the ruler tight against the window frame and cut close and smooth. The extra will peel easily away and the window film should now be a perfect fit.